Mountain Biking for Beginners: Essential Guide to Hit the Trails in 2024
I’m so glad you’re here to discuss Mountain Biking for Beginners: Essential Guide. Did you know that mountain biking saw a remarkable 120% surge in popularity during recent years? There’s never been a better time to hit the trails!
Whether you’re an experienced road cyclist looking to venture off the beaten path or a complete newbie to two wheels, this comprehensive guide will help you kickstart your mountain biking journey. From choosing your first bike to mastering fundamental techniques, we’ve got you covered – let’s get rolling! Are you ready to get schooled on the best mountain bikes?
Essential Mountain Biking for Beginners
In full transparency I have not had the opportunity to personally test the products in this review. However, I promise to provide my unbiased opinion. After dropping way too much cash on gear I didn’t need (and not enough on gear I did), I figured I should share what I’ve learned about essential mountain biking gear. I still remember looking for my first bicycle with my mom wanting to buy the best cheap mountain bike. Of course I was not paying!
First things first – let’s talk about the bike itself, because this is where I see most beginners (myself included) getting stuck. You’ve basically got two main types to consider: hardtail and full-suspension bikes. The latest addition to the party are electric mountain bikes. Later we’ll dive into the differences and options available for mountain bikes vs. electric mountain bikes.
A hardtail only has front suspension and typically costs between $800-1,500 for a solid entry-level model. Entry-level hardtails are usually lighter because they lack the rear suspension equipment. They are easy to lift up and down, climb stairs, etc. Of course, the specific weight depends on the model and the materials used. Mountain bike frame materials can make a big difference in performance.

Full-suspension bikes have shock absorption in both the front and back, but they’ll set you back at least $2,000 for a decent one. A good choice will be ready for a beating right out of the box needing no upgrades to provide years of thrilling trail rides. Speaking of trails, who thinks they know what are the best mountain bike trails in America? What about the different types of mountain bike trails. All are topics of future articles. Stay tuned.
How to buy a mountain bike with confidence, will also be discussed in another article. I’m a huge fan of bikes and would happily ride one every day! While they’re awesome for rougher terrain, I honestly don’t think most beginners need a full-suspension one starting out a hardtail should be just fine.

Now, about safety gear – and I learned this one the hard way after taking a nasty spill on several of my rides. Your absolute must-haves are:
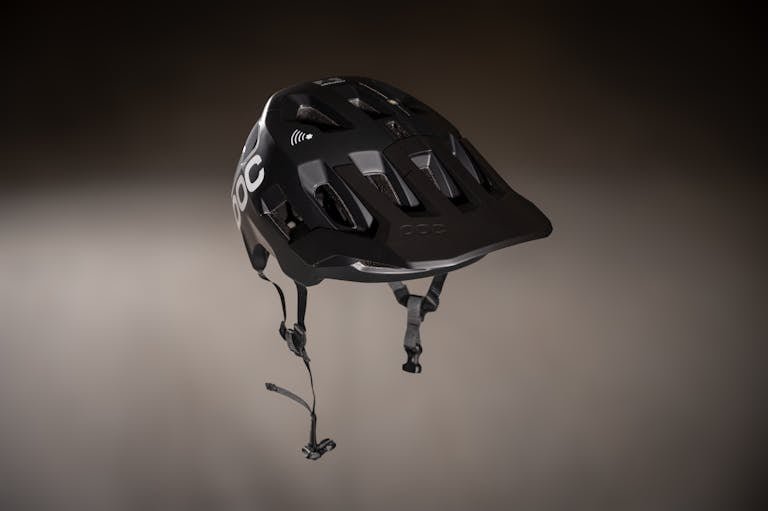
- A quality helmet (spend at least $70-100 on this – your brain is worth it!)
- Padded cycling gloves ($25-40)
- Knee pads ($40-60 for a good pair)
I actually resisted wearing knee pads at first because I thought they’d be uncomfortable. Then I watched my buddy Winston slide down a rocky section and walk away without a scratch thanks to his pads. I was Sold right there!
For accessories, you’re gonna want:
- One water bottle cage and or camelbak sack($20-70)
- A basic repair kit with tire levers and spare tubes ($20-30)
- A multi-tool with allen keys ($25-40)
- A small frame pump ($20-50)
Here’s a pro tip that took me way too long to figure out: get a small seat bag to hold your repair stuff. I used to carry everything in a backpack and it was such a pain. The seat bag is like $15-20 and keeps everything right where you need it.
When it comes to buying your first mountain bike, there’s a sweet spot between “cheap enough that you won’t cry if you decide the sport isn’t for you” and “good enough that it won’t fall apart on the trail.” Look for these key features:
- Hydraulic disc brakes (way better stopping power than mechanical)
- At least 100mm of front suspension travel
- Modern geometry with a head tube angle around 67-69 degrees
- Tubeless-ready wheels (you’ll thank me later when you avoid pinch flats)
I’ve found that brands like Trek, Specialized, and Giant all make reliable entry-level bikes. The Specialized Rockhopper, Trek Marlin 7, or Giant Talon 2 are solid choices that usually run between $800-1000. Yeah, that might seem like a lot, but it’s way better than what I did – buying cheap first, then realizing I needed to upgrade almost immediately.
One thing that always trips up newcomers is sizing. Don’t just go by height charts – actually go and sit on some bikes at your local shop. The big box stores have options to try as well. The reach (how far you have to stretch to the handlebars) is just as important as the standover height. And don’t be afraid to ask questions – bike shop folks are usually super helpful if you’re genuine about wanting to learn. There is no harm to ask for a test ride if available. Don’t forget the helmet! Not enough can be said about choosing the best mountain bike helmet.
Remember, you don’t need everything at once. Start with the essential safety gear and basic repair kit, then add more specialized equipment as you discover what kind of riding you enjoy most. This will help prevent mountain biking injuries. Trust me, your wallet (and probably your significant other) will thank you for taking it slow!
Understanding Basic Mountain Biking Techniques
Let’s talk about mastering those basic mountain biking techniques – something I literally learned from the ground up (and yes, I mean that quite literally). After countless scrapes, bruises, and one particularly memorable encounter with a tree, I’ve picked up some wisdom that’ll hopefully save you some band-aids and heart ache.
The absolute game-changer for me was learning proper body positioning. I used to ride like I was stuck to my seat, which worked great… until it really didn’t. Here’s what took me way too long to figure out: your bike and body should work independently. Think of your bike as a separate thing moving under you while your body stays level. When you’re on flat ground, keep your arms slightly bent and your pedals level – what we call the “ready position.” Your weight should be centered, not leaning too far forward or back.
Braking was another thing that totally threw me for a loop at first. I kept death-gripping those brakes like they were my lifeline! The key thing to remember (which my buddy Mike had to drill into my head) is that your front brake provides about 70% of your stopping power, but you need to use it carefully. Start with light pressure on both brakes, then gradually increase as needed. And please, for the love of all things holy, don’t grab a fistful of front brake while turning – trust me on this one!
Speaking of shifting, there’s definitely a right way and a wrong way. I learned the wrong way first, naturally. Here’s the deal: shift before you need to, especially when approaching hills. If you wait until you’re halfway up a climb to shift, you’re gonna hear some pretty ugly noises from your drivetrain. Try to maintain a steady cadence around 80-90 rpm – it should feel like you’re spinning pretty easily, not mashing the pedals. Mountain Bike pedals are important and will be the topic of future articles.
Now, let’s talk about obstacles. The biggest mistake I see beginners make (and yep, I did this too) is staring directly at whatever they’re trying to avoid. Remember this: your bike goes where your eyes go. If you’re staring at that big rock you don’t want to hit, guess what? You’re probably gonna hit it! Look where you want to go instead. For basic obstacles like small logs or rocks, the technique is pretty straightforward:
- Approach at a moderate speed (not too slow!)
- Get into ready position
- Lift your front wheel slightly as you reach the obstacle
- Shift your weight back slightly as your rear wheel follows
Hills were my nemesis for the longest time. For climbing:
- Shift into an easier gear before you need it
- Keep your weight forward to prevent the front wheel from lifting
- Maintain steady pressure on the pedals
- Look ahead about 15-20 feet, not right in front of your wheel
For descending (this one took me forever to get comfortable with):
- Get your butt off the seat and behind it on steep sections
- Keep your arms and legs relaxed (they’re your suspension)
- Look way ahead down the trail
- Feather your brakes instead of grabbing them hard
Let me share some common beginner mistakes I’ve either made or watched others make:
- Looking down instead of ahead (guilty!)
- Riding with locked elbows (leads to sore wrists and poor control)
- Staying seated all the time (your legs are your best suspension)
- Not maintaining momentum through technical sections
- Forgetting to drink water (rookie mistake that’ll end your ride real quick) leads to cramping also.
The biggest piece of advice I can give? Start slow and build up gradually. I’ve seen too many folks try to bomb down advanced trails their first week out. There’s no shame in walking sections you’re not comfortable with – the trail will still be there next time. Focus on mastering these basics first, and you’ll be amazed at how quickly your confidence grows. Later we’ll discuss some tips on night riding techniques for mountain bikers.
Remember, every expert rider started exactly where you are now. They just kept at it, learned from their mistakes (probably made a few new ones), and gradually built up their skills. Take your time, practice these fundamentals, and most importantly, have fun with it!

Finding and Choosing Beginner-Friendly Trails
Let me tell you about finding those perfect beginner trails.
Understanding trail ratings really isn’t as straightforward as you might think. I remember staring at my first trail map like it was written in hieroglyphics! Here’s what those symbols typically mean:
- Green circles: Easy, mostly flat with minimal obstacles
- Blue squares: Intermediate, with some technical features
- Black diamonds: Advanced – stay away for now, trust me!
But here’s something I learned the hard way – trail ratings can be pretty subjective. What’s considered a “green” trail in Colorado might be more like a “blue” in Florida. That’s why it’s super important to read recent trail reviews and descriptions, not just go by the rating alone.
The best beginner trails typically have these characteristics (and I’m speaking from experience after trying way too many that didn’t):
- Wide paths with clear sightlines
- Gradual climbs instead of steep ones
- Few or no mandatory technical features
- Multiple “ride around” options for obstacles
- Good trail maintenance (you don’t want surprise fallen trees)
- Cell phone coverage (yeah, learned that one the hard way)
Finding these trails has gotten so much easier with modern apps. TrailForks and MTB Project have been absolute game-changers for me. They show you not just where trails are, but important details like:
- Recent trail conditions
- Elevation profiles
- Technical difficulty ratings
- User reviews and photos
- Parking information
- Whether the trail is currently open
One thing these apps won’t tell you though – and this is crucial – is how crowded a trail gets at different times. My local favorite trail is perfect for beginners… except on Saturday mornings when it’s packed with speed demons training for races. I usually check Facebook groups or ask at local bike shops about the best times to ride specific trails.
Speaking of local communities – joining one was seriously the best decision I made as a beginner. Most areas have groups specifically for new riders, and they’re usually super welcoming. I found my group through Instagram, but you can also check:
- Local bike shops (they often host beginner rides)
- Facebook groups
- IMBA (International Mountain Biking Association) chapters
- State or city mountain biking organizations
These groups aren’t just great for finding trails – they’re goldmines of local knowledge. Like finding out which trails drain well after rain (because riding muddy trails is a big no-no). Later we’ll talk about how to clean mountain bikes after mud. There are other helpful tips like which parking lots to avoid leaving valuables in (unfortunately learned that one from experience).
When it comes to safety considerations for choosing trails, there are some things the ratings won’t tell you:
- Cell phone coverage (always check this first!)
- Distance from the nearest access point
- Whether the trail is one-way or bidirectional
- How many bailout points there are
- If there’s water available
- Whether you need a permit to ride there
I always recommend new riders follow my “15-minute rule”: Pick trails that loop back to the starting point every 15 minutes or so. This way, if something goes wrong or you get tired, you’re never too far from your car.
One final tip that’s served me well – always do a “preview ride” of a new trail on a weekend morning when other riders are around. Nothing’s worse than trying a new trail for the first time, alone, on a Tuesday evening, and realizing you’re in over your head (yes, that’s a very specific example from personal experience). It’s safer when other bikers are around.
Remember, there’s absolutely no shame in starting small. Those scary black diamond trails aren’t going anywhere – they’ll still be there when you’re ready for them. Focus on finding trails that match your current skill level and let you build confidence gradually. The goal is to have fun and prevent mountain biking injuries. Stay safe, don’t prove anything to anyone!

Mountain Biking Safety and Trail Etiquette
- Basic trail rules and right-of-way guidelines
- Communication signals on the trail
- Weather considerations and preparation
- Pre-ride safety checks
- Emergency preparedness basics
Let me share what I’ve learned about trail safety and etiquette – including that time I learned the hard way about yielding on blind corners. Spoiler alert: meeting another rider head-on isn’t fun for anyone!
Trail etiquette is actually pretty straightforward once you know the basics. A Mountain Bike Bike Park Etiquette Guide would be really helpful right about now. Oh wait stay tuned it’s coming. The golden rule that took me a while to fully grasp is that uphill riders always have the right of way. Why? Because it’s way harder to get started again going uphill than down. I used to think “faster rider gets priority” until an older rider set me straight about this one.
Here’s the basic yielding hierarchy that’ll save you from some awkward trail moments:
- Everyone yields to horses (and give them plenty of space)
- Bikers yield to hikers
- Downhill riders yield to uphill riders
- When in doubt, just be courteous and stop
Let’s talk about trail communication, mountain biking signals are super important. I still remember my first group ride where someone yelled “On your left!” and I promptly moved left directly into their path (oops). Here are the essential callouts you need to know:
- “Rider back!” when approaching from behind
- “Rider up!” when climbing toward others
- “Last rider!” when you’re the final person in a group
- “Clear!” when passing through a blind intersection
Weather prep is something I’ve gotten better at since that time I got caught in a surprise thunderstorm with nothing but a t-shirt. The best mountain bike gear is nothing to take lightly. Before heading out, I always check:
- The hourly forecast (not just the daily overview)
- Recent rainfall (muddy trails are a no-go, unless you enjoy slipping and getting really dirty)
- Temperature changes (afternoons can get HOT)
- Wind conditions (especially important for exposed trails)
One thing that’s saved me multiple times was having a weather app that shows radar. You can use the weather app on your phone or install a widget. Those afternoon mountain storms can sneak up crazy fast and be pretty violent. Take cover if you get caught in one!
Pre-ride checks are like flossing – everyone knows they should do them, but sometimes we get lazy. After having my chain snap five miles from the trailhead, I now religiously check these things:
- Tire pressure (this varies by terrain and riding style)
- Brake function hydraulic and mechanical (squeeze both levers)
- Chain lubrication
- Quick release/thru-axle tightness
- Basic bolt check (no wobbling parts!)
The ABC check works great:
- Air (in tires)
- Brakes (working properly)
- Chain/cranks (moving smoothly)
Now, about emergency prep. Here’s what I now always carry:
- Basic first aid kit ($20-30 at any outdoor store)
- Fully charged phone (in a waterproof case)
- Trail map downloaded offline
- Emergency contact info
- Small flashlight or headlamp
- Basic tools and spare tube
- More water than I think I’ll need
One thing that really opened my eyes was taking a basic wilderness first aid course. It taught me that the most common mountain biking injuries are pretty minor – scrapes, sprains, and bruises – but knowing how to handle them makes a huge difference.
I’ve also learned to always tell someone where I’m riding and when I expect to be back. There’s this great app called Strava Beacon that lets trusted contacts track your ride in real-time. Life360 app also works well for tracking family members and friends. Super helpful for peace of mind, especially if you’re riding solo.
Speaking of riding. How to transport your mountain bike safely should be considered and will be discussed later on. Riders should always opt to ride with a friend if possible. I dial back my riding about 20% when I’m alone. No hero moves, no “just one more try” at that difficult section. The trail will still be there next time!
A quick word about wildlife encounters (yep, had a few of those too). The key is to make noise on blind corners and never get between a mama animal and her babies. I now keep a small bell on my handlebars – some folks find them annoying, but I’d rather annoy someone than surprise a bear!
Remember, good trail etiquette isn’t just about being polite – it’s about keeping everyone safe and making sure the trails stay open for all of us to enjoy. The mountain biking community is generally super friendly and forgiving of honest mistakes, but it’s on each of us to learn and follow these basic rules. Trust me, your fellow riders will appreciate it!
Building Your Mountain Biking Skills
Let me tell you about building up those mountain biking skills – a journey that’s taught me the delicate balance between pushing your limits and, well, pushing your luck! I’ve gone from barely being able to ride over a root to tackling some pretty wicked stuff, but it definitely didn’t happen overnight.
Starting with the basics was absolutely crucial, even though my ego wasn’t too happy about practicing in parking lots. But here’s the thing – those fundamental skills are what save your bacon when things get sketchy on the trail. I spent my first few weekends just working on these core skills:
- Track stands (balancing your bike while stationary)
- Looking over your shoulder without wobbling
- Riding with one hand while maintaining control
- Tight turns without putting a foot down
- Emergency stops without skidding
One game-changer for me was setting up little obstacle courses in empty parking lots. I’d use water bottles as cones and practice weaving between them, first slowly, then picking up speed. This is how I learned about the value of the best mountain bike pedals for beginners.

When it comes to gaining confidence, I learned (the hard way) that it’s all about progressive challenges. Here’s what worked for me:
- Master each skill on flat ground first
- Move to slight inclines or declines
- Try it on actual trails at slow speeds
- Gradually increase speed as comfort grows
The biggest mistake I see folks make (and yeah, I did this too) is trying to progress too quickly. There was this one time I decided to hit a black diamond trail because “how bad could it be?” Turns out, pretty bad! Now I follow what I call the “90% rule” – if I can’t clear a feature 9 out of 10 times at my current level, I’m not ready to move up.
Speaking of moving up to harder trails, here are some signs that you’re ready:
- You’re getting bored on your current trails
- You can ride your regular routes without putting a foot down
- Basic obstacles don’t make you nervous anymore
- You’re maintaining good form even when tired
- You’re comfortable with basic bike maintenance
Which leads me to why winterizing an mountain bike is crucial and discussed in following articles.
For training progressions, I’ve found this sequence works really well:
- Green trails focusing on smooth cornering (2-3 months)
- Easy blue trails with small obstacles (2-3 months)
- Technical blue trails with rock gardens (3-4 months)
- Blue trails with optional black features (when ready)
Don’t rush these timeframes! I tried to speed through them and ended up having to go back and relearn proper technique. It’s way better to spend extra time building a solid foundation than to develop bad habits you’ll have to fix later.
Now, let’s talk about common obstacles and how to tackle them. Roots used to be my nemesis until I learned these approaches:
For small roots:
- Keep your speed steady
- Stay loose in your arms and legs
- Look past the obstacle, not at it
- Lift your front wheel slightly if needed
For rock gardens:
- Momentum is your friend (but not too much!)
- Pick your line and stick to it
- Keep your pedals level
- Stay light on the handlebars
One thing that really helped me level up was recording myself riding. Yeah, it feels kind of dorky at first, but seeing what you’re actually doing (versus what you think you’re doing) is super enlightening. I discovered I was target-fixating on obstacles way more than I realized!
Here’s a progression I use for learning any new skill:
- Practice stationary or very slow
- Break it down into smaller parts
- Focus on one element at a time
- Gradually increase speed
- Add complexity only when comfortable
Remember that mental game is huge in mountain biking. Start by keeping a “skills journal” where you track what you’re working on and your progress. It’s amazing to look back and see how far you’ve come, especially on those days when you’re feeling stuck.
And don’t forget about “session-ing” obstacles – that’s when you practice one specific feature multiple times. Just remember to pull off the trail when doing this, and make sure other riders can pass safely. I typically do this during off-peak hours when the trails are quieter.
Most importantly, listen to your gut about when to push and when to pull back. There’s no shame in walking a section that doesn’t feel right – the trail will still be there next time. The best riders I know got that way by making steady progress over time, not by trying to conquer everything in one season. Keep it fun, keep it progressive, and you’ll be amazed at what you can tackle with time!
Mountain biking engages in a whole new world of adventure, fitness, and outdoor exploration. We haven’t even begun to discuss the best electric mountain bikes yet. Remember, everyone starts as a beginner – take your time, focus on fundamentals, and most importantly, have fun! Ready to start your mountain biking journey? Grab your gear, find a beginner-friendly trail near you, and discover why this thrilling sport has captured the hearts of millions. See you on the trails!
Engage. Endure. Enjoy!
Find More Resources on Bicycles
- Smart Bike Trainers: 2024 Best Picks with Features and Benefits
- Mountain Biking for Beginners: Essential Guide to Hit the Trails in 2024
- 3 Best Mountain Bikes of 2024: Complete Buyer’s Guide & Reviews
- How Do You Adjust Bike Brakes? A Step-by-Step Guide for 2024
- Essential Mountain Bike Gear: A Complete Guide for 2024