How to Transport Your Mountain Bike Safely in 2024
How to Transport Your Mountain Bike Safely is a topic that often gets overlooked. Transporting your bike safely can be a nightmare, especially if you’re not sure of the best ways to go about it.
Whether you’re getting ready to take a road trip, moving to a new home, or simply heading to a local park, proper bike transportation is crucial to making sure your bike arrives safely at its destination. In this comprehensive guide, we’ll dive into the various bike transport systems, preparation tips, installation techniques, safety considerations, and long-distance travel advice to help you confidently transport your bike.
Different Types of Bike Transport Systems
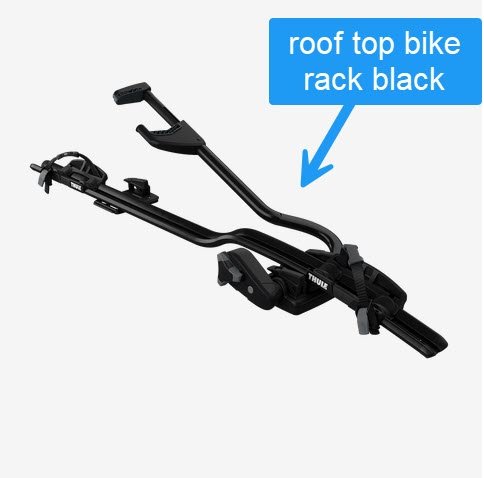
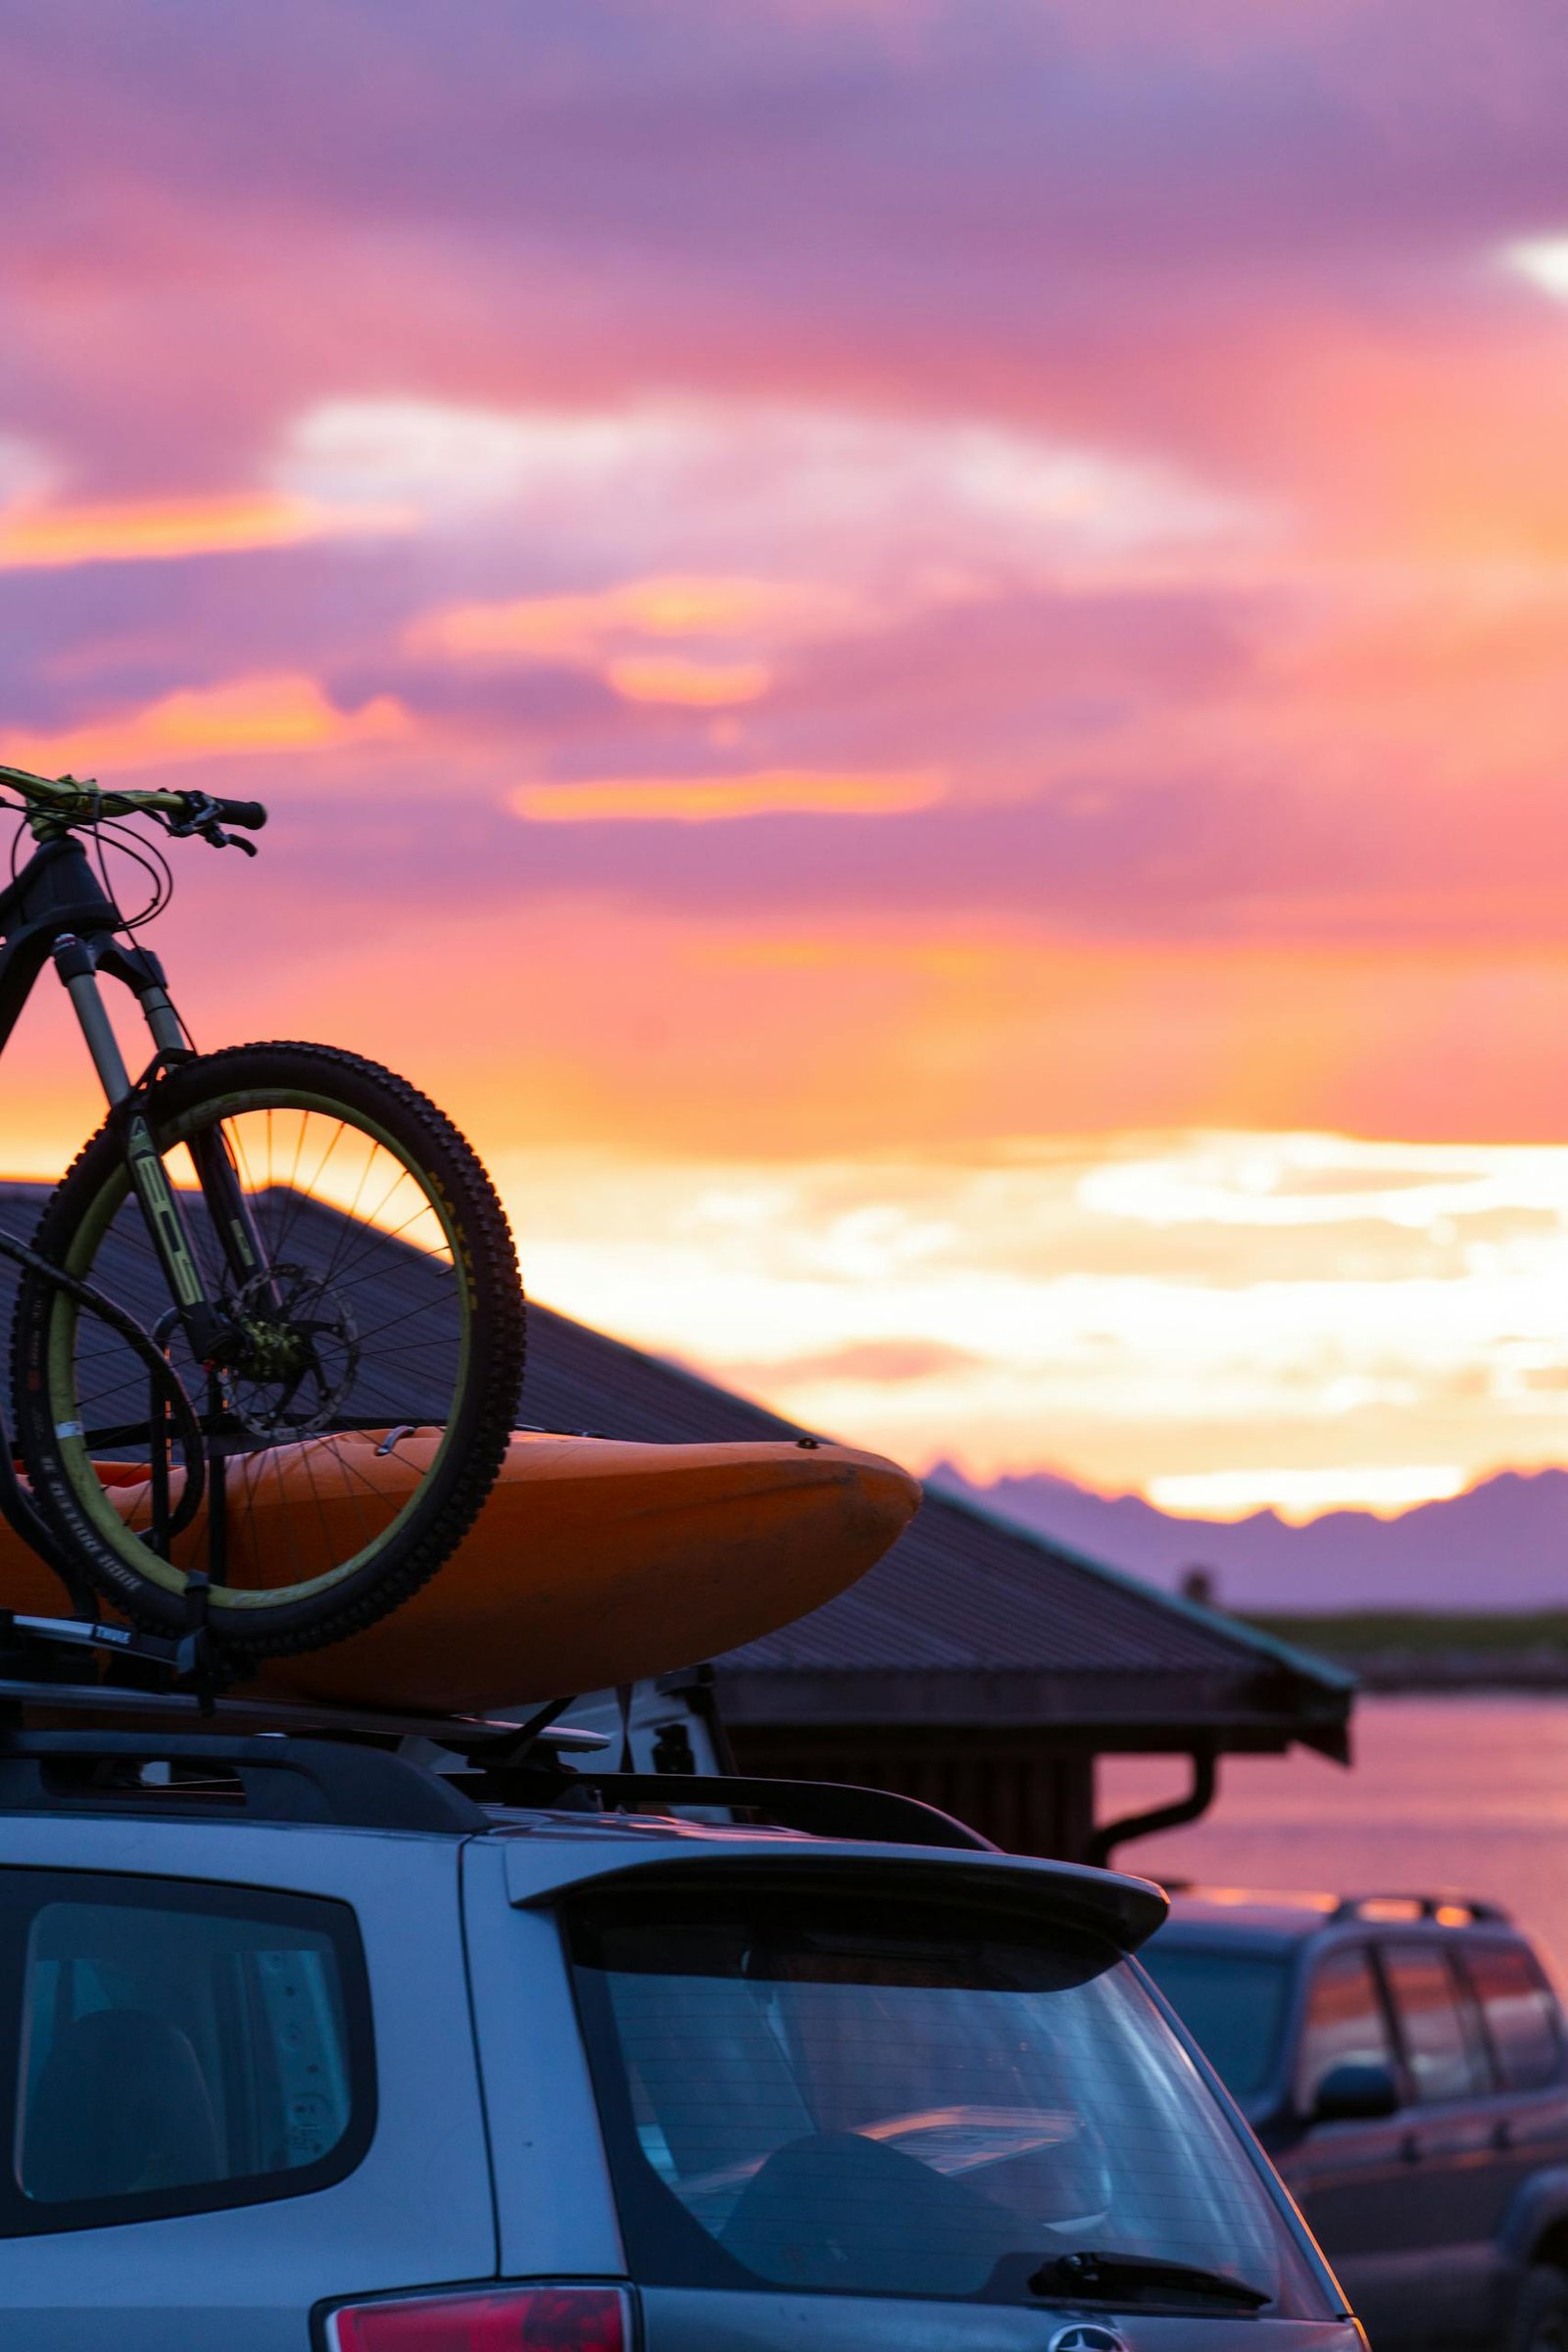
Roof-Mounted Bike Racks
Roof-mounted bike racks offer a clean, aerodynamic method for transporting your bike. If you elevate the bike above your vehicle’s roofline, you can reduce drag and improve fuel efficiency. However, these can be a bit more challenging to install and require some physical effort to load and unload your bike.
Pros
Cons
Installation Tips:
- Choose the Right Rack: Consider your vehicle’s roof type and the number of bikes you need to transport.
- Follow the Instructions: Carefully read and follow the manufacturer’s instructions.
- Use the Right Tools: Have the necessary tools on hand, including a drill, screwdriver, and wrench.
- Check for Leaks: After installation, inspect the roof for any potential leaks.
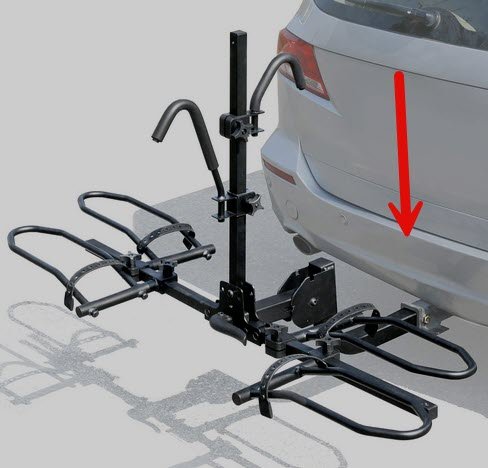
Hitch-Mounted Carriers
Hitch-mounted bike carriers are a popular choice for many cyclists because of their ease of use and versatility. They come in different styles, from single-bike platforms to multi-bike racks.
Pros
Cons
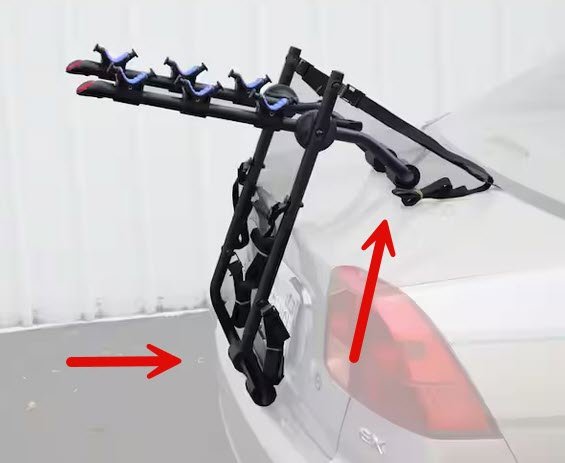
Trunk-Mounted Racks
Trunk-mounted racks are where you can save money on occasional bike transport. They clamp onto the vehicle’s trunk or tailgate, offering a simple solution for carrying one or two bikes. I have one from Thule that works really well. Lots of straps, two points of contact!
Pros
Cons
Truck Bed Transport Methods
For truck owners, transporting bikes in the bed is a straightforward approach. You can use various methods to tie down your bikes, including:
- Ratchet Straps: Secure bikes to the bed’s tie-down points using ratchet straps.
- Bike Racks: Install a truck bed bike rack to hold bikes securely in place.
- Wheel Chocks: Use wheel chocks to prevent bikes from sliding around.
Interior Vehicle Solutions
If you have an SUV or van, you can transport bikes inside the vehicle. This method offers excellent protection from the elements but may limit passenger or cargo space.
Tailgate Pads
Tailgate pads are another way to transport bikes on pickup trucks without damaging tailgates. They provide a soft, protective surface for the bikes to rest on.
Vertical vs. Horizontal Mounting Systems
When choosing a bike rack, you’ll need to decide between vertical and horizontal mounting systems:
- Vertical Mounting: Allows you to transport multiple bikes in a compact footprint. But it can be more challenging to load and unload.
- Horizontal Mounting: Easier to load and unload but takes up more space on the vehicle.
Budget-Friendly Alternatives
If you’re on a tight budget, consider these affordable bike transport options:
- Used Racks: Purchase a used bike rack from online marketplaces like ebay or local bike shops.
- Rental Racks: Rent a bike rack for your specific trip.
- Call a Friend: Try to borrow one that is not being used on that day.

Preparing Your Bike for Transport
Thoughtful preparation is always the way to go if you want to Transport Your Mountain Bike Safely. If you want your bike to arrive at its destination in pristine condition. Follow these steps to get your bike ready for transport:
Cleaning and Maintenance
- Clean Your Bike: Really clean your bike to remove dirt, grime, and grease.
- Lubricate the Chain: Make sure your chain has enough oil
- Check Tire Pressure: Check your tires to see if they are inflated to the recommended pressure.
- Inspect Brakes and Shifters: Make sure your brakes and shifters are working properly.
Removing Vulnerable Components
- Remove Pedals: Pedals can be easily damaged during transport. Remove them and store them safely. Some allow you to fold them down if taking them off is not an option.
- Lower Seat Post: Lower the seat post to prevent it from getting caught or damaged.
- Disassemble Wheels (Optional): For long-distance transport, you may want to take off your wheels to provide additional protection.
Protecting Your Bike
- Frame Protection: You can use frame protection pads or bubble wrap to protect your bike’s frame from scratches and dents.
- Wheel Protection: Wrap your wheels in bubble wrap or use wheel bags to protect them from damage.
- Component Protection: Use zip ties or tape to secure loose components like brake and derailleur cables.
Securing Your Bike
- Tighten Loose Parts: Please check that all bolts, nuts, and screws are tightened down.
- Use Straps or Racks: Secure your bike to your vehicle using straps or a bike rack.
- Consider a Bike Box: For long-distance or international shipping, consider using a bike box to provide maximum protection.

Step-by-Step Installation Guide
Choosing the Right Mounting Position
- Consider Vehicle Type: Choose a mounting position that is compatible with your vehicle.
- Assess Weight Distribution: Distribute the weight of your bike evenly to avoid overloading any specific area of your vehicle.
- Check Clearance: Make sure that your bike rack doesn’t obstruct your vehicle’s lights, license plate, or rearview mirrors.
Proper Rack Assembly and Installation
- Follow Instructions: Carefully read and follow the manufacturer’s instructions for your specific bike rack. Don’t skip this part!
- Use the Right Tools: Have the necessary tools on hand, such as wrenches, screwdrivers, and a drill. You should’nt have to go out and buy anything. What you have around the house should suffice.
- Tighten Securely: Ensure that all bolts and nuts are tightened securely to prevent your bike from shifting during transport. Then double check right before you leave.
Securing Attachment Points
- Identify Attachment Points: Locate the correct attachment points on your vehicle and bike rack.
- Use Strong Straps: Use high-quality ratchet straps or cam straps to secure your bike to the rack.
- Cross-Strap for Stability: Cross-strap your bike to the rack to prevent it from swaying or shifting.
Testing Stability Before Travel
- Visual Inspection: Visually inspect the bike rack and bike to ensure they are securely attached.
- Manual Test: Gently rock the bike to check for any movement or instability.
- Road Test: If you head out on a long trip, take your vehicle for a short drive to make sure the bike rack and bike are stable.
Height and Width Clearance Checks
- Garage Clearance: Ensure that your vehicle with the bike rack can fit into your garage or other storage areas. Before closing the door.
- Overhead Obstacles: Beware of low-hanging branches, bridges, and other obstacles.
- Side Clearance: Avoid parking too close to other vehicles or objects to prevent accidental damage.
Weather Protection Measures
- Cover Your Bike: Use a bike cover to protect your bike from rain, snow, and dust.
- Waterproof Bags: Store your bike accessories and clothing in waterproof bags.
- Consider Climate-Controlled Storage: If you’re storing your bike for an long time, consider storing it in a climate-controlled environment. Like a garage or dry basement.
Lock Systems and Security Features
- Secure Your Bike: Use high-quality bike locks to deter theft.
- Consider GPS Trackers: You should invest in a GPS tracker to help locate your bike if it is stolen.
- Park in Well-Lit Areas: Park your vehicle in well-lit areas to deter thieves.
Common Installation Mistakes to Avoid
- Improper Tool Usage: Use the correct tools and avoid over-tightening bolts.
- Incorrect Attachment Points: Make sure you’re using the appropriate attachment points on your vehicle and bike rack.
- Neglecting Weight Distribution: Distribute the weight of your bike evenly to prevent overloading any specific area of your vehicle.
- Ignoring Safety Warnings: Pay special attention to safety warnings and guidelines provided by the manufacturer.

Safety and Legal Considerations
Safe and legal bike transport is vital to protect yourself, your bike, and other people on the roads. Here are some important safety and legal considerations to remember:
License Plate Visibility Requirements
Ensure Visibility: Make sure your vehicle’s license plate is visible from the rear when transporting a bike rack.
Check Local Regulations: Some states may have specific regulations regarding license plate visibility.
Rear Light and Reflector Regulations
Make sure your vehicle’s rear lights and reflectors are visible and working correctly.
Consider adding additional lights or reflectors to your bike rack or bike to improve visibility.
Maximum Bike Rack Load Limits
Check Vehicle’s Capacity: Avoid overloading your vehicle’s roof or hitch receiver.
Check the vehicle’s owner’s manual and bike rack instructions for specific weight limits.
Highway Safety Guidelines
Secure Your Load: Ensure that your bike is securely fastened to the bike rack to prevent it from shifting or falling off.
Maintain Vehicle Control: Be aware of the increased wind resistance and weight distribution when transporting a bike.
Avoid Sudden Maneuvers: Avoid sudden stops, starts, and turns, as these can destabilize your bike and vehicle.
Highway Driving Adjustments
Reduce Speed: Reduce your speed to account for increased wind resistance and reduced vehicle stability.
Maintain Safe Following Distance: Increase your following distance to allow for longer stopping distances.
Be Mindful of Crosswinds: Be cautious of crosswinds, which can affect your vehicle’s stability.
State-Specific Transport Laws
Research Local Laws: Familiarize yourself with the specific laws and regulations in your state or region regarding bike transport.
Check for Permit Requirements: Some states may require permits for transporting oversized loads.
Proper Warning Flags and Markers
Use Reflective Markers: When and where possible, use reflective markers or flags to increase visibility, especially during nighttime or low-visibility conditions.

Tips for Long-Distance Transport
Long-distance bike transport requires additional planning and preparation. If you want a smooth journey, here are some tips to help you navigate long distances:
Regular Check-Stops and Maintenance
Schedule Regular Stops: Plan regular stops to inspect your bike and vehicle.
Check Tire Pressure: Monitor tire pressure and adjust as needed.
Lubricate Chain: Apply chain lubricant to keep your chain running smoothly.
Tighten Loose Parts: Check for and tighten any loose bolts or nuts.
Storage Solutions for Gear
Use Bike Bags: Pack your bike clothing, tools, and accessories in bike bags to keep them organized and protected.
Use Vehicle Storage: Use your vehicle’s trunk, cargo area, or roof rack to store additional gear.
Emergency Tool Kit Essentials:
Multi-Tool: A multi-tool can be used for various bike repairs.
Spare Tubes and Tire Levers: Carry spare tubes and tire levers for flat tire repairs.
Pump: A mini pump is essential for inflating tires.
Chain Tool: A chain tool can be used to remove and replace a broken chain link.
Patch Kit: A patch kit can be used to repair small punctures in your tires.
Communication with Riding Partners
Use Communication Devices: Use cell phones, two-way radios, or other communication devices to stay in touch with your riding partners.
Establish Check-in Points: Set up regular check-in points to ensure everyone is on track.
Develop an Emergency Plan: Create a plan for handling emergencies, such as accidents or breakdowns.
Journey Planning Guidelines
Research Your Route: Research your route to identify potential challenges and road hazards.
Plan Your day: Create a detailed itinerary, including lodging, dining, and sightseeing stops.
Budget for Unexpected Expenses: You never know what could happen, allocate a budget for unexpected expenses, such as repairs or overnight stays.
Pack Essential Documents: Bring necessary documents, such as your driver’s license, registration, and insurance information.
Wrapping Up
Transporting your mountain bike doesn’t have to be a source of stress! By choosing the right carrier system and following proper security measures, you can focus on the adventures ahead rather than worrying about your bike. Remember to regularly check your mounting system’s security during long trips, and always prioritize both your bike’s and other road users’ safety.
By following these guidelines and considering your specific needs, you can confidently transport your bike to your desired destination. Remember, proper preparation, secure installation, and adherence to safety regulations are essential for a smooth and hassle-free journey. So, pack your bags, load up your bike, and hit the road with peace of mind!
Engage, Endure and Enjoy!
Find More Resources on Bicycles
- Smart Bike Trainers: 2024 Best Picks with Features and Benefits
- Mountain Biking for Beginners: Essential Guide to Hit the Trails in 2024
- 3 Best Mountain Bikes of 2024: Complete Buyer’s Guide & Reviews
- How Do You Adjust Bike Brakes? A Step-by-Step Guide for 2024
- Essential Mountain Bike Gear: A Complete Guide for 2024