Electric Bicycle Conversion Guide
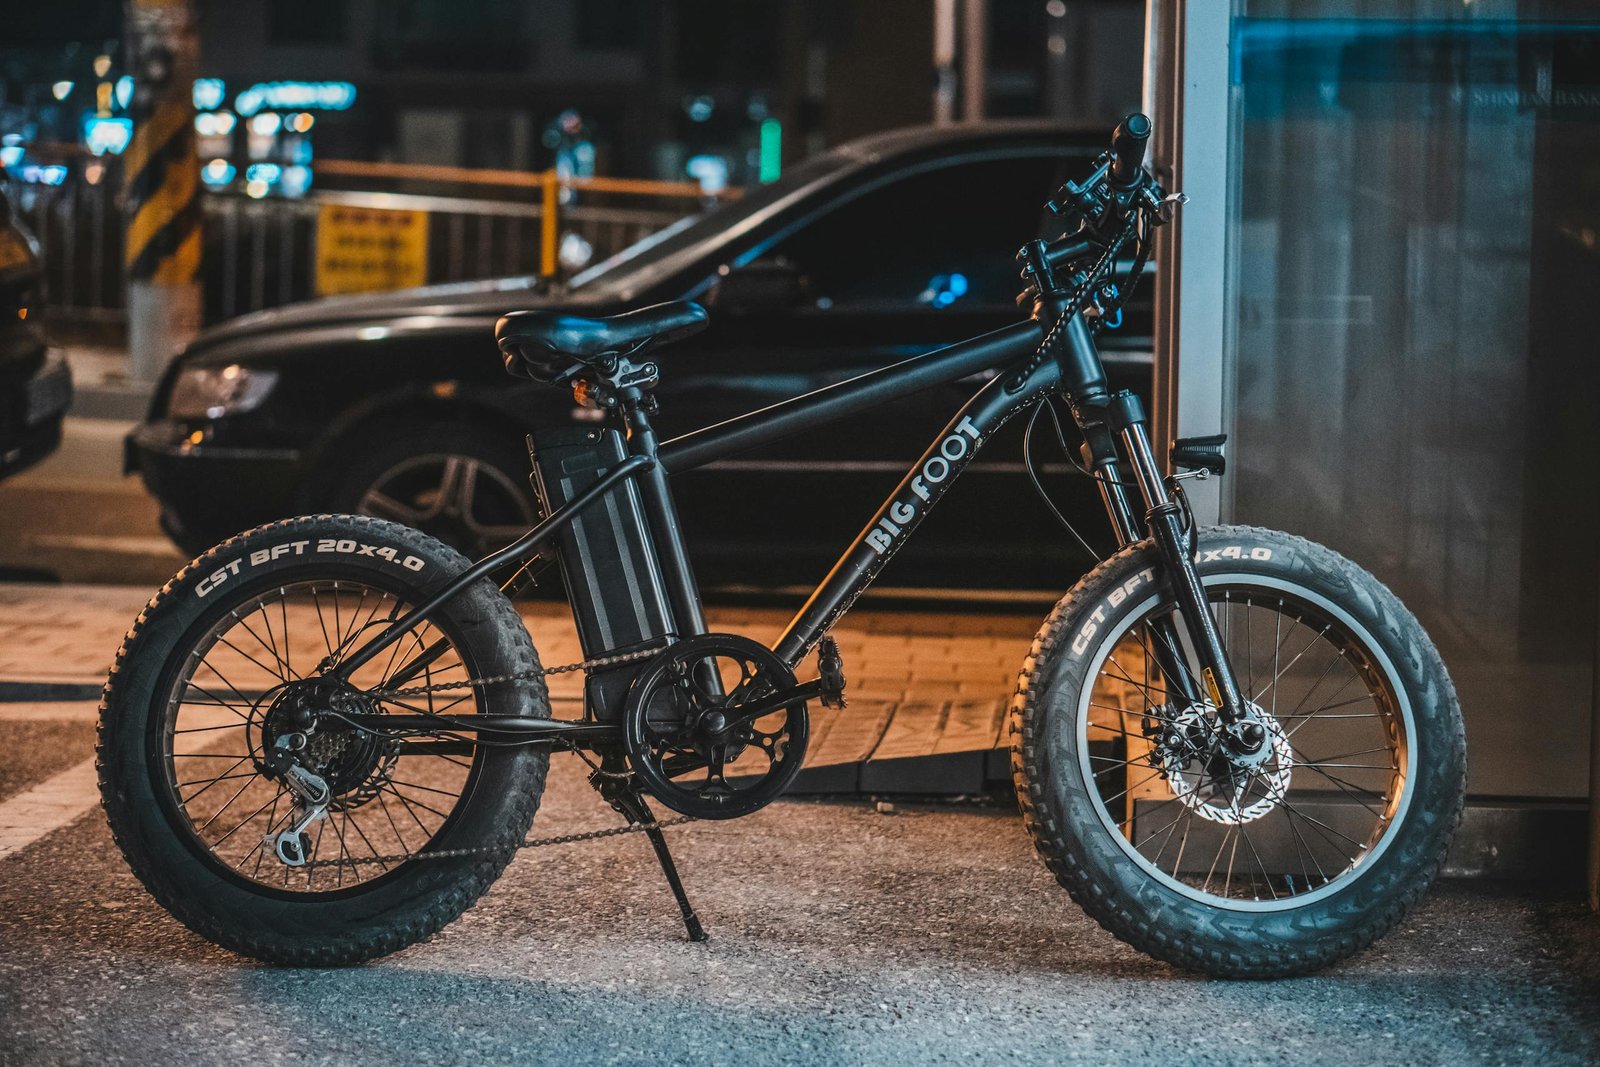
With our electric bicycle conversion guide you can learn how to transform your standard bicycle into an electric bike. Electric bikes are everywhere, but dropping $2,000 on a new e-bike isn’t always an option. What if you could breathe new life into your old bicycle for a fraction of the cost. Sounds good to me too.
E-bike conversions are the ultimate way for cyclists that are looking to add some electric bang to their ride. In this guide, I’ll break down everything you need to know about converting your bicycle to electric from choosing the right kit to navigating the technical challenges. Let’s jump in.
Understanding E-Bike Conversion Kit Types: A Cyclist’s Deep Dive
I’ll be straight with you. I was completely overwhelmed by the sheer number of conversion kit options available. We’ll just focus on the types for this article.
The World of Motor Conversion Technologies
Electric bicycle conversion isn’t a one-size-fits-all adventure. Each motor type brings its own personality to the table, and understanding these differences can mean the difference between a smooth ride and a bad trip.
Wheel Hub Motor Conversions: The Entry-Level Champion
Hub motors are basically the most preferred option of electric bicycle conversion. They’re straightforward, relatively affordable, and can be installed by someone with basic mechanical skills. Hub motor kits can be installed with relative ease and they can be shut down completely when your battery is low.
Imagine, a motor literally built into your wheel’s hub, ready to give you that electric boost.
The installation can be surprisingly manageable, but it can come with some quirks. Do your homework and follow the instructions provided. Front hub motors can feel a bit weird when accelerating, almost like your bike is being pulled forward instead of powered smoothly.
Pros of hub motor conversions:
- Lower cost compared to other conversion methods
- Relatively simple installation
- Works with most bicycle frames
- Minimal modifications to your existing bicycle
Cons to consider:
- Added weight in the wheel can affect bike handling
- Less efficient on hills compared to mid-drive systems
- They can create uneven weight distribution
- Reduction in pedaling efficiency
Mid-Drive Motor Systems: The Performance Enthusiast’s Choice
If hub motors are the reliable family sedan, mid-drive motors are the high-performance sports cars of electric bicycle conversion. These motors mount directly to your bike’s bottom bracket, working together with your existing gearing system.
These systems provide incredible torque and make hill climbing feel like a breeze. The motor’s placement allows it to leverage your bicycle’s existing gears, which means more efficient power transfer. Mid-drive conversions can provide a more natural bike-riding experience with better torque, but they tend to be a bit pricier than direct drive hub motors.
Advantages of mid-drive conversions:
- Superior weight distribution
- Better hill-climbing performance
- More natural riding feel
- Works seamlessly with bicycle’s gear system
Potential drawbacks:
- Significantly more expensive
- More complex installation process
- Requires more advanced mechanical knowledge
- Can put additional stress on bicycle’s drivetrain
Friction Drive Technologies: The Unconventional Underdog
Friction drive systems are integrated into the wheel or bottom bracket, these systems press a small motorized wheel against your bicycle’s tire to provide propulsion.
They work brilliantly on dry, flat surfaces. Encounter any moisture or a slight incline and things get complicated real fast.
Friction drive highlights:
- Lightweight installation
- Minimal bicycle modifications required
- Quick and relatively easy to set up
- Lower cost compared to other systems
Significant limitations:
- Poor performance in wet conditions
- Reduced traction on uneven terrain
- Limited power output
- Potential tire wear

Compatibility: The Make-or-Break Factor
Here’s the most crucial advice I can give you about electric bicycle conversion: not every motor works with every bicycle frame. Frame geometry, dropout spacing, and intended use all play massive roles in determining your conversion success. If you’re commuting on relatively flat terrain and want to keep the costs down, a basic hub motor kit could be the way to go.
My advice for ensuring compatibility:
- Measure your bicycle frame precisely
- Check dropout width and type
- Consider your typical riding terrain
- Research conversion kit manufacturers
My Hard-Earned Recommendation
For casual riders hub motors might be your best bet. And for the performance enthusiasts, mid-drives are calling your name. If you’re experimenting on a budget then give friction drive a shot.
Just remember – electric bicycle conversion is part science, part art, and entirely about enjoying the ride. Don’t be afraid to make mistakes, learn, and most importantly, have fun transforming your bicycle into an electrified marvel.
Selecting the Right Motor and Battery: The Power Behind Your Ride
When I first started diving into electric bicycle conversion, I quickly realized that choosing the right motor and battery is critical. One wrong move, and you’ll end up with a completely underwhelming – or potentially dangerous – riding experience.
Understanding Motor Power: More Than Just Numbers
Let me break down motor selection. Your bicycle’s personality matters just as much as the motor’s specifications. A lightweight road bike needs a completely different motor approach compared to a heavy-duty mountain bike.
Matching Motor to Bicycle DNA
Different bicycle types demand different motor characteristics:
Road Bikes:
Typically need 250-500W motors
Mountain Bikes:
Can handle 500-750W for rough terrain
Commuter Bikes:
Best with 350-500W motors
Cargo Bikes:
Might require 750-1000W for heavy loads
Battery Basics: The Heartbeat of Your Electric Conversion
Battery selection is where most DIY converters get totally lost. It’s not just about capacity – it’s about understanding the difference between voltage, amp-hours, and your riding needs.
Voltage and Wattage Demystified
Think of voltage like the muscle of your electric system. Higher voltage means more power potential. Most electric bicycle conversions use 36V or 48V systems. My recommendation is to start with a 48V system if your budget allows. It provides better hill-climbing performance and more consistent power delivery.
Wattage calculation isn’t rocket science, but it requires some basic math:
- Watts = Volts x Amps
- A 48V, 10Ah battery provides approximately 480 watt-hours
- This translates to roughly 20-30 miles of assisted riding
Range Considerations: Planning Your Electric Journey
Range isn’t just a number – it’s your ticket to freedom. I’ve had rides cut short by poor battery planning, and trust me, pedaling a heavy e-bike without assist is not where you want to be.
Factors affecting battery range:
- Rider weight
- Terrain type
- Assistance level
- Wind conditions
- Tire pressure
- Battery age and condition
Always calculate your expected range and then subtract 20%. Real-world conditions are rarely perfect, and it’s better to have battery life left than to be stranded. If you normally can ride for 60 minutes then plan a 40 minute ride to be safe.
Battery Placement: More Strategic Than You’d Think
Where you mount your battery can dramatically impact your ride’s balance and handling. It’s not just about convenience.
Placement strategies:
- Rear rack mounting: Most common, good for weight distribution
- Down tube mounting: Excellent for lower center of gravity
- Triangle frame mounting: Provides balanced weight distribution
- Integrated battery designs: Sleekest but often most expensive
Performance vs. Efficiency: The Eternal Trade-off
You can’t have maximum power and maximum range simultaneously. It’s like trying to eat cake and stay on a diet, something’s gotta give.
Performance-focused setups typically mean:
- Higher voltage
- More powerful motors
- Shorter range
- Faster acceleration
Efficiency-focused setups usually offer:
- Lower voltage
- Moderate motor power
- Extended range
- More consistent power delivery

My Personal Battery Selection Checklist
Before purchasing any battery for electric bicycle conversion, ask yourself:
- What’s my typical riding distance?
- What terrain will I primarily ride?
- How much weight am I carrying?
- What’s my budget for replacement batteries?
Always invest in a quality battery management system (BMS). Cheap batteries might save money upfront but can become safety hazards and perform poorly.
Remember, selecting the right motor and battery isn’t an exact science – it’s an art form. Experiment, learn, and most importantly, enjoy the electrifying journey of converting your bicycle into something extraordinary.
Essential Tools and Equipment for Conversion: A Practical DIY Guide
Converting a bicycle isn’t just about having the right parts, it’s about having the right tools.
The Ultimate Conversion Toolkit
Let’s break down the essentials you’ll absolutely need:
- Adjustable Wrench Set
- Multiple sizes (8-15mm are crucial)
- Helps with nearly every connection point
- Allen Key Collection
- Metric sizes (most bicycle components use these)
- Includes both L-shaped and standard hex keys
- Get a good set – trust me, you’ll use them
- Torque Wrench
- Critical for precise tightening
- Prevents over-tightening sensitive electrical components
- Helps maintain manufacturer specifications
- Wire Cutters and Strippers
- Invest in quality electrical wire tools
- Precision matters when dealing with e-bike wiring
- Look for insulated handles for safety
Safety Equipment: Non-Negotiable Gear
Safety isn’t optional.
Essential safety gear:
- Insulated electrical gloves
- Safety glasses
- Non-conductive work mat
- Fire extinguisher (seriously! You never know.)
- Voltage testing equipment
Budget-Friendly Alternatives
Not everyone has hundreds to drop on professional tools. Here are some wallet-friendly suggestions:
- Borrow from friends or neighbors
- Check online marketplace for used tools
- Buy mid-range tools instead of top-tier brands
- Watch for sales at hardware stores
Diagnostic and Testing Equipment
The hidden heroes of successful conversions:
- Continuity tester
- Voltage meter
- Battery capacity checker
- Digital torque gauge
- Infrared temperature gun (to monitor motor heat)
Common Mistakes to Avoid
- Using incorrect wire gauges
- Failing to properly insulate connections
- Overtightening sensitive components
- Neglecting proper grounding
- Skipping basic safety checks
The Real Cost of Tools
Budget breakdown:
- Basic toolkit: $100-$200
- Comprehensive setup: $300-$500
- Professional-grade: $600-$1000
Start basic and upgrade as you gain experience. Your first conversion is a learning experience, not a professional installation.
Final Thoughts
Converting a bicycle to electric isn’t just about parts – it’s about preparation, patience, and having the right tools. Every screw, wire, and connection tells a story of your mechanical adventure.
Remember, the right tools transform a potentially frustrating project into an enjoyable journey of creation. Embrace the process, stay safe, and get ready to electrify your ride! Start planning your e-bike conversion today and join the electric cycling revolution!
Engage, Endure and Enjoy!
Find More Resources on Bicycles
- Smart Bike Trainers: 2024 Best Picks with Features and Benefits
- Mountain Biking for Beginners: Essential Guide to Hit the Trails in 2024
- 3 Best Mountain Bikes of 2024: Complete Buyer’s Guide & Reviews
- How Do You Adjust Bike Brakes? A Step-by-Step Guide for 2024
- Essential Mountain Bike Gear: A Complete Guide for 2024


