How to Measure Your Perfect Bike Frame Size
Today we’re diving deep into the world of how to measure your bike frame size. Here’s the good news: measuring your ideal bike frame size isn’t rocket science. Did you know some riders are using incorrectly sized bikes – but you won’t be one of them!
Today, I’m sharing my knowledge of bike fitting to help you ace those measurements. Also, if you’re just starting out check out my guide to Mountain Biking for Beginners. Whether you’re shopping online or in-store, these proven techniques will ensure you find your perfect frame size.
Let’s get into the essential measurements that’ll make every ride feel like it was made just for you!
Essential Measurements You Need to Take for Bike Frame Size Fitting

Let me walk you through the most crucial measurements you’ll need to know for how to measure your bike frame size and get a correct bike fit.
Inseam (Inside Leg) Measurement Process
Getting your inseam right is absolutely critical. Here’s the exact process: stand barefoot against a wall with your feet 6 inches apart.
Take a hardcover book and place it spine-up between your legs, firmly against your body (just like a bike seat). Have someone mark where the top edge of the book meets the wall, then measure from the floor to this mark.
Torso Length and Its Importance
Here’s something interesting – your torso length can actually be more important than your overall height! Stand straight against a wall and measure from your collarbone’s notch (that little dip at the base of your neck) to where your hip bones meet at your pelvis.
Don’t skip this measurement, it’s crucial for determining your reach to the handlebars.
Arm Length Measurement Technique
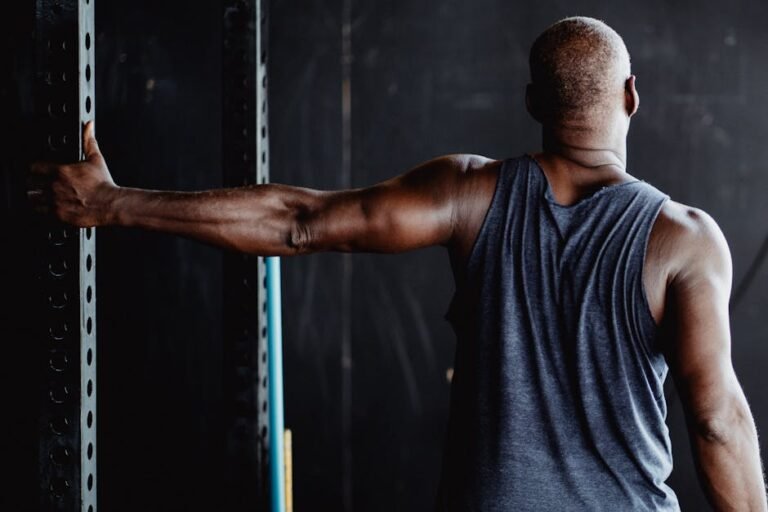
For arm length, you’ll need a buddy to help. Stand with your arm straight out to the side, and measure from your collarbone to your palm’s center.

Total Height and Its Role
While total height isn’t the be-all-end-all some people think it is. It’s still needed to if you want to answer the question of how I measure a bikes frame size and for getting in the right ballpark.
Flexibility Assessment Basics
This is the measurement that often gets overlooked, but it’s super important. Do a standing toe touch with straight legs and measure the distance between your fingertips and the floor.
If you can’t touch your toes, you’ll probably need a more upright position. If you’re pretty flexible you’ll probably prefer a more aggressive position.
Remember, these measurements work together like puzzle pieces to create your perfect bike frame size. Don’t rush through them – accuracy here makes the difference between loving every ride and feeling like OMG!
Step-by-Step Measuring Process with Tools
I’ve learned that accurate measurements are the difference between loving your ride and dreading it. Most bikes, either road or mountain, are now measured in metric units. This is why this comprehensive guide was created to help us understand the bicycle frame size chart.
Required Tools and Setup
You don’t need any fancy equipment, but you do need the right tools. Here’s exactly what you should gather:
- A metal measuring tape (cloth ones can stretch and give inaccurate readings)
- A hardcover book for inseam measurement
- A level or straight edge
- Clinometer app for measuring angles (its free at Google Play)
- A pencil and paper for recording
- A flat wall and hard floor surface
Proper Stance and Positioning
Getting your stance right is crucial. For your inseam measurement, stand with your feet exactly 6 inches apart, heels against the wall. Your back should be straight but relaxed.
For torso measurements, you’ll want to stand tall but natural. Measure as you normally would.

Recording Measurements Accurately
Try to write everything down immediately. Don’t trust your memory! First, record these key measurements:
- Inseam (floor to book edge)
- Torso length (collarbone notch to pelvis)
- Arm length (collarbone to palm center)
- Total height (no cheating!)
- Flexibility measurement (fingertip to floor distance)
Double-Checking Your Numbers
This is super important – take each measurement twice! I always try to spend an extra five minutes double-checking it can save hours of heart ache later. If your measurements differ by more than 1/4 inch, take a third measurement.
Using Digital Tools and Apps
I’m old school at heart, but some digital tools can really help. The Clinometer app is primarily used to measure angles. It can be really useful in determining the degree of the slope of top tub length. This is one way to make sure you’re getting the most accurate measurement.

In addition, apps can be great for recording and tracking your measurements over time. Just remember that they’ll need to be updated and require manual verification for complete accuracy.
Getting accurate numbers is super important – don’t just eyeball it or take rough measurements.
Understanding Bike Frame Numbers
Let me break down these measurements in a way that actually makes sense, without all the confusing jargon that made me scratch my head initially.
Decoding Frame Size Charts
Here’s something cool – different types of bikes use totally different measurement systems. Road bikes typically use centimeters (ranging from 48cm to 63cm), while some mountain bikes use inches (usually 13″ to 23″). Some also use standard S, M, L and so on.
Frame charts can look like ancient hieroglyphics at first glance.
Pro tip: Always convert everything to centimeters first – it makes comparing bikes super easier.

Stack and Reach Explained
Okay, let’s talk about stack and reach. Stack is the vertical distance from the bottom bracket to the top of the head tube, while reach is the horizontal distance between these points.
For reach you’ll need to measure the distance to the top of the head tube and the distance to the bottom bracket, then subtract one from the other.
The stack measures the vertical distance. Measure from the ground to the top of your head tube, then measure the height of your bottom bracket from the ground and subtract this.
These numbers can be a little difficult to obtain but fear not, fight on!

Stand over Height Importance
Stand over height isn’t just about avoiding an uncomfortable landing on your top tube (though trust me, that’s important too!). You should have 1-2 inches of clearance between you and the top tube when standing flat-footed. You should be able to dismount with ease.
Top Tube Length Significance
Here’s something that blew my mind when I first learned it – top tube length might be more important than the actual frame size number! It determines your riding position and reach to the handlebars.
The effective top tube length (measured horizontally from seat post to head tube) should match your torso and arm measurements.

Seat Tube Measurements
The seat tube measurement is what most people think of as “frame size,” but here’s the thing – it’s just one piece of the puzzle!
Measure from the center of the bottom bracket (where the pedal cranks meet) to the top of the seat tube.
Some bikes have slanted seat tubes. In this case line up your straight edge and measure from the center bottom bracket to the top of the seat tube.
Pro tip: Don’t get too hung up on seat tube length alone. Your inseam measurement should be about 67-70% of the frame size for a road bike.
Remember that taking the time to understand these measurements will benefit you in the long run. You’ll also be able to make sense out of all those numbers on new bike technical sheets.

Common Measuring Mistakes to Avoid
Inaccurate Inseam Measurements
You need to simulate actual riding pressure with that book between your legs.
Incorrect Measuring Tool Usage
If you’ve got a straight seat tube, you can measure the seat tube angle by lining up your smartphone and reading the number from the clinometer app which I mentioned earlier. Before you do, make sure your bike is vertical and stands flat on a horizontal surface for accurate reading.
Poor Posture During Measuring
Standing properly is crucial – and it’s not just about standing straight. You want your feet exactly 6 inches apart, weight evenly distributed. If you lean to one side or standing military-straight style it can through the numbers off.
Rounding Numbers Incorrectly
Here’s a mistake I made early on – Bike measurements are precise – that quarter inch really matters! You may have to round up to the nearest inch or centimeter. Most manufacturers work in increments of 0.5cm or 0.25 inches, so your measurements should too.
Ignoring Manufacturer Variations
This one’s sneaky – not all manufacturers measure the same way. Always check the manufacturer’s specific sizing guide. Remember that Specialized uses their own size charts.
In any event, taking accurate measurements isn’t just about being precise – it’s about being consistent and understanding what you’re measuring. These numbers work together like puzzle pieces to create your perfect bike frame size. Trust me, spending an extra 10 minutes getting accurate measurements can save you from months of discomfort!
Adjusting Measurements by Bike Type

Road Bike Specific Considerations
Road bikes are super particular about measurements. Road bikes typically measure in centimeters (48cm-63cm), and you’ll want about 1-2 inches of stand over clearance.
Mountain Bike Sizing Differences
Mountain bikes are a whole different animal! They use inches (typically 13″-23″) and need more stand over height – at least 2-3 inches of clearance. Trust me, when you’re descending a steep trail, you’ll be thankful for that extra space!
Hybrid Bike Adaptations
Hybrids are like the Goldilocks of bikes – they need just-right balance between road and mountain bike measurements. They usually follow road bike sizing but with a more upright position.
E-Bike Measurement Variations
E-bikes are one of my favorites and they have become very popular! The added weight means you need more stand over height than a regular bike – about an extra half-inch should do. Plus, the motor placement can affect your natural riding position.
Make sure you can balance the bike evenly between your legs. I’ve noticed some e-bike riders need slightly smaller frames than they’d use on traditional bikes.
Women-Specific Geometry Notes
Here’s something that surprised me – women-specific geometry isn’t just about making frames smaller! It’s also about proportions. Many women have longer legs relative to their torso length compared to men.
Remember, these adjustments are just suggestions – they’re not supposed to make any feel bad. The right measurements for your bike type can make the difference between loving every ride and feeling like you’re not sure you want to do this again!
Solving Between-Sizes Dilemmas
I can tell you that being between sizes is super common – and it used to drive me nuts! Let me share what I’ve learned about making this tricky decision easier.
When to Size Up vs. Size Down
Here’s the golden rule I follow: if you’re between sizes, your riding style should guide your choice. For aggressive riding or racing, size down for better control. For casual riding or longer distances, consider sizing up for more stability.
Make sure that you can handle the bike confidently in all weather conditions!

Component Adjustments for Perfect Fit
The secret sauce is in the components! A shorter stem (the part connecting handlebars to frame) can fix a slightly large frame, while a longer stem helps with a smaller one. Just remember – never go beyond 20mm adjustment from stock length, or you’ll mess with the bike’s handling.
Test Ride Importance
Trust me on this – never skip the test ride! Take both sizes for a spin, and pay attention to how the bike feels when cornering and stopping. Most riders can immediately feel which size is right once they’re actually on the bike. If you’re just starting out check out my guide for beginners.
Frame Size vs. Fit Adjustments
Sometimes the frame size matters less than you’d think. I’ve seen riders get perfect fits through smart component adjustments like seat post setback, stem length, and handlebar width. But here’s the catch – most bike frame size issues can’t be solved with adjustments alone, which is why getting the right bicycle frame size is crucial.
Custom Sizing Solutions
When standard sizes just won’t do, don’t panic! Custom solutions like proportional crank lengths or offset seat posts can work wonders.
Remember being between sizes isn’t a curse – it’s an opportunity to really dial in your perfect bike frame size. Take your time, test thoroughly, and don’t be afraid to make those component adjustments. Your perfect bike frame size is out there!
Wrapping Up
Finding your perfect bike frame size doesn’t have to be overwhelming. Read on to find out what are the best frame materials to size up your road bike or mountain bike and ensure you get the right fit. Armed with these measuring techniques and insider tips, you’re now equipped to make an informed decision about your ideal frame size.
Remember, a properly fitted bike isn’t just about comfort – it’s about safety and unlocking your full cycling potential to enjoy every moment on two wheels.
Ready to put these measurements into action? Grab your measuring tape and get started! And remember, when in doubt, it’s always worth consulting a professional bike fitter for that extra peace of mind. Happy measuring, and here’s to many comfortable miles ahead!
Engage, Endure and Enjoy!
Find More Resources on Bicycles
- Smart Bike Trainers: 2024 Best Picks with Features and Benefits
- Mountain Biking for Beginners: Essential Guide to Hit the Trails in 2024
- 3 Best Mountain Bikes of 2024: Complete Buyer’s Guide & Reviews
- Bicycle Chain Maintenance: 2025 How to Clean and Lube Guide
- Essential Mountain Bike Gear: A Complete Guide for 2024


